
20 Dreamy Mermaid Nails Ideas for Every Style
Mermaid nails are pure magic for your fingertips. Think shiny pearls, soft ocean blues, dreamy shells, and a little sparkle in every light. If you have been scrolling for your next set, you are in the right place.
Choosing a new nail design can feel exciting and a little stressful at the same time. Maybe your polish chips after two days. Maybe your short nails feel plain, or you are not sure which shade looks best on your skin tone. If that sounds like you, you are not alone.
You might also worry about damage. Strong removers, rough filing, and rushed removals can leave natural nails thin and sore. I see these problems all the time, and the good news is that they are easy to fix.
In this guide, I share 20 mermaid nails ideas you can show your nail tech or try at home. You will see ocean blue sets, pearly chrome shells, soft pastel scales, and glam 3D designs. Each idea comes with a quick description, why it works, and one pro tip.
I wrote this guide to be simple and friendly. You do not need fancy skills or expensive tools to get started. Some designs are easy to try at home, and others are best saved for your nail tech. Either way, you will leave with ideas you can use right away.
After the designs, you will find simple advice on nail shapes, skin tones, short nails, tools, and aftercare. Whether your nails are short, long, or natural, there is a mermaid look here for you. Let’s dive in!
Ocean Blue Mermaid Nails
If the sea had a color, it would be blue. These first five sets use aqua, teal, and baby blue to bring that fresh ocean feeling to your fingertips.
Blue is also one of the easiest colors to wear. It looks clean, calm, and bright, and it pairs well with gold, silver, and pearl details.
Start here if you want mermaid nails that feel simple but still special. Most of these designs use a nude or clear base, so they match almost any outfit. Scroll down and pick the shade that feels like your favorite beach day.
1. Aqua Blue Tips with Starfish and Pearls

Description: Glossy aqua French tips meet 3D shell nails and bold blue starfish. Pearls and gold beads outline the curves, with one tiny gold star on top.
Why It Works: The nude base lets the bright blue pop on any skin tone. Long almond nails give the 3D details room to shine.
Pro Tip: Press gems into a thin layer of builder gel before curing so they stay put.
2. Jelly Teal French Tips with Aqua Gems
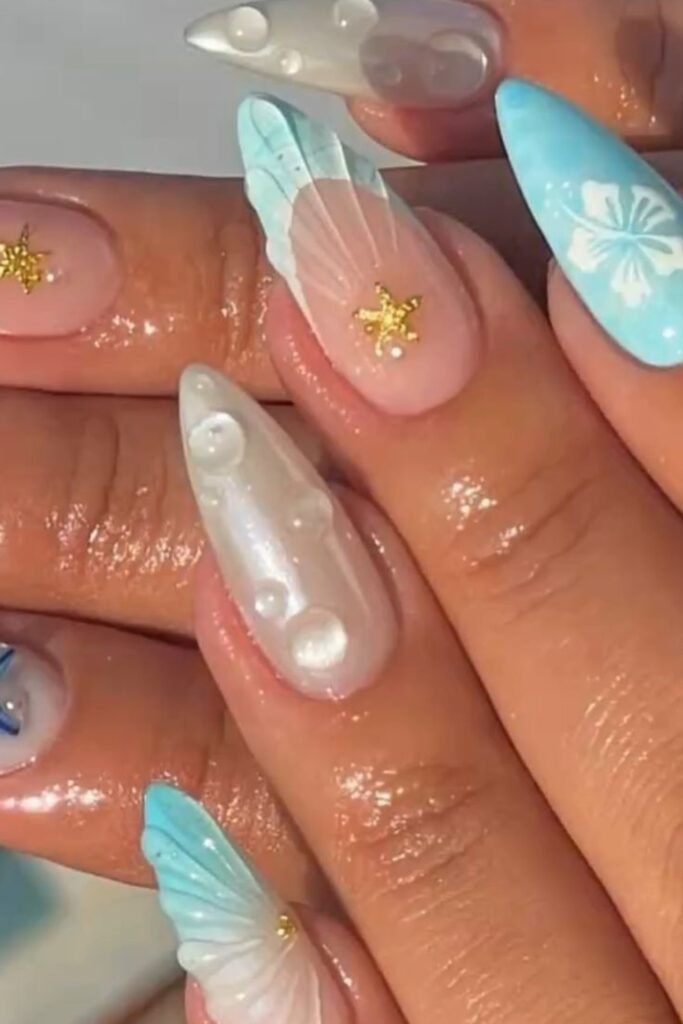
Description: Clear nude nails get glossy teal jelly tips and a sprinkle of tiny aqua rhinestones. It looks like sunlight dancing on shallow water. This one feels soft, fresh, and easy to wear.
Why It Works: It suits short and medium nails and fits work, school, or brunch. The sheer base also hides grow-out.
Pro Tip: Place each gem with a wax pencil, then add a dab of gel under it.
3. Metallic Teal Waves with Icy Ombre

Description: Shiny teal chrome nails carry white wave and shell stamping, while icy blue ombre tips frost the rest. It looks like sea foam on a bright day. You only need a stamping plate and a pearl pigment.
Why It Works: Stamping is great for beginners because the pattern is already made. It flatters warm and cool skin tones.
Pro Tip: Wipe the stamping plate with remover between prints so the lines stay sharp.
4. Chrome Teal Swirl Nails

Description: Glittery teal chrome swirls curl across the nail like gentle waves. Shimmery French tips on the plain nails add a soft pink glow. It feels glossy and magical.
Why It Works: Short almond nails look extra stylish with this sculpted look. The pink nude base keeps everything clean.
Pro Tip: Rub chrome powder over a no-wipe top coat, then seal it with a fresh top coat.
5. Baby Blue Water Nails with 3D Butterfly

Description: A baby blue water ripple base holds a 3D butterfly and drops of milky pearl. Wavy white shell tips decorate the other nails. It is sweet, airy, and perfect for spring.
Why It Works: Light blue flatters fair, tan, and deep skin alike. Mixing plain and detailed nails keeps it from feeling too busy.
Pro Tip: Use a fine brush and thin white gel to paint the shell lines in one smooth stroke.
Elegant Pearl and Chrome Mermaid Nails
Not every mermaid look has to be loud. Some of the prettiest sets are soft, shiny, and a little mysterious, like the inside of an oyster shell.
These six designs use pearl, aurora chrome, and touches of gold. They look expensive, but they are easy to wear every day.
I love this group for anyone who wants elegant nails for weddings, work events, or date night. The shine does most of the talking, so you do not need much else. Pick one that fits your style and give it a try.
6. Holographic Pastel Shell Nails

Description: Pink, blue, and lilac chrome stripes glow like the inside of a seashell. One accent nail has a 3D shell with tiny pearls. The look is dreamy and beachy.
Why It Works: Pastel shine looks lovely on every skin tone. It is easy to wear on short to medium almond nails.
Pro Tip: Apply chrome powder with a silicone tool and press lightly for an even glow.
7. Lavender Pearl Chrome Shell Nails

Description: Every nail wears a raised shell with ridged lines in lavender and soft blue. Pairs of tiny pearls sit at the base. The pearl chrome glows like an oyster.
Why It Works: The repeated shape looks neat on short nails. It is a lovely pick for weddings or date night.
Pro Tip: Draw the ridges with thick gel and cure each line briefly to lock in the shape.
8. Gold Outlined Nudes with Iridescent Shells
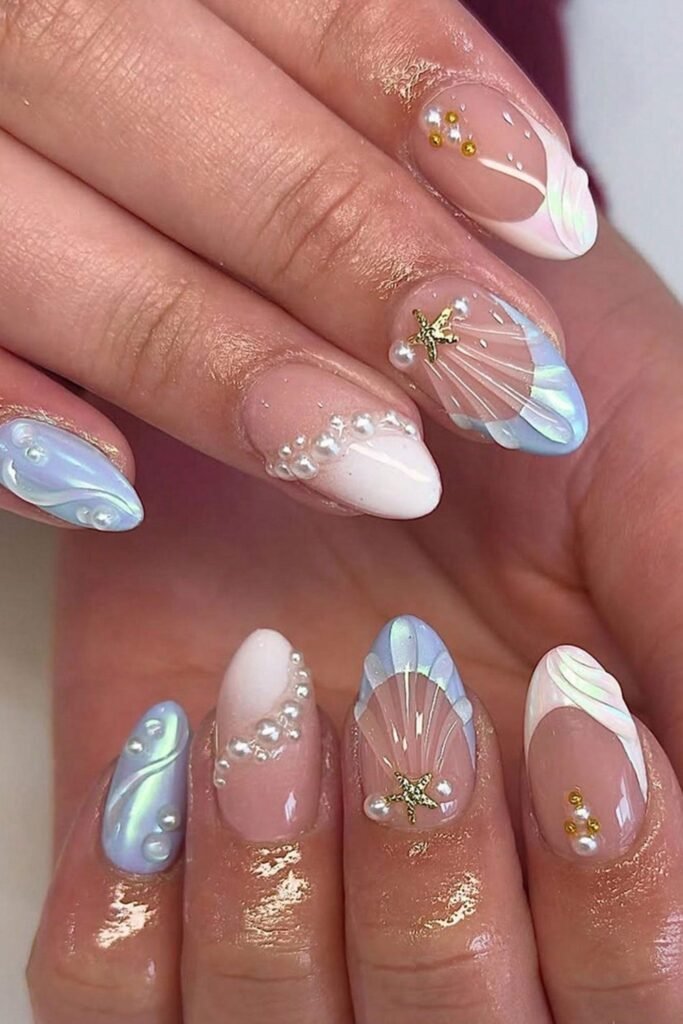
Description: Sheer pink nails get thin gold outlines, and a few are topped with iridescent 3D shells and gold beads. Tiny bubble pearls finish the look. It feels simple, fancy, and light.
Why It Works: The nude base suits all skin tones and makes nails look longer. Fans of quiet luxury will love it.
Pro Tip: Draw the outline with a liner brush and gold gel in small steps.
9. Aurora Chrome Shells with Liquid Gold
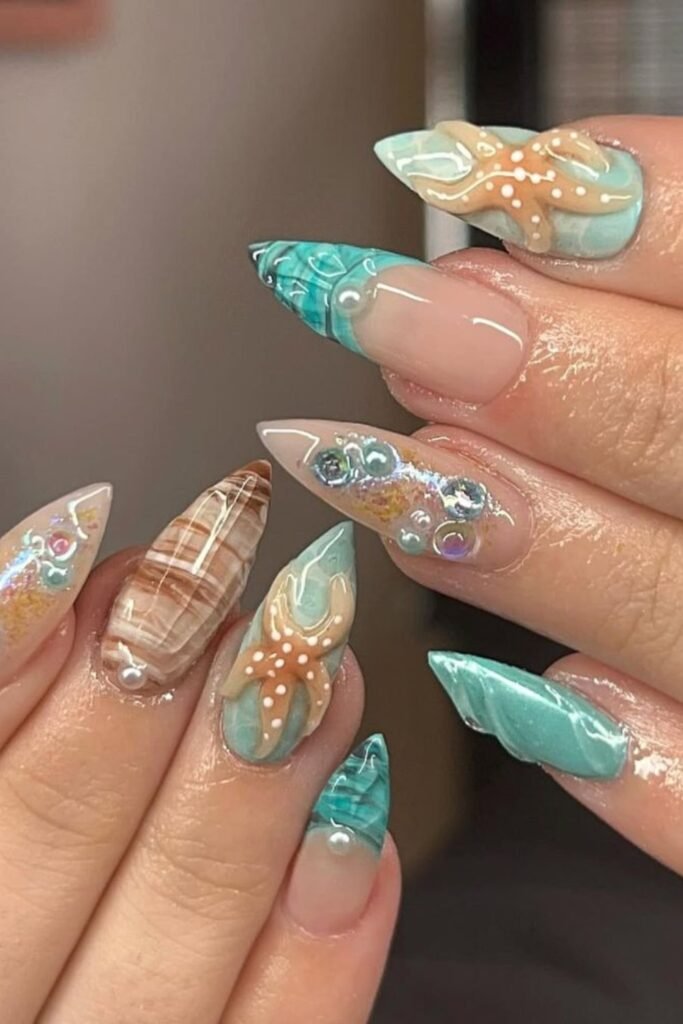
Description: Long stiletto nails glow with aqua aurora shells and shiny pearl nails. Molten gold lines and a tiny gold shell charm add drama. It feels bold, rich, and a bit dreamy.
Why It Works: Long nails give sculpted details space to show. Gold looks beautiful on warm, olive, and deep skin tones.
Pro Tip: Shape the gold foil gel with a small tool while it is soft, then cure it right away.
10. Seafoam Green Chrome with Gold Line Art

Description: Seafoam chrome nails carry thin gold lines, tiny beads, and shell-like etching. Pearly nude nails with a golden edge balance the look. It feels calm and glassy, like sea glass.
Why It Works: Soft green works well on neutral and olive skin tones. It also suits medium almond nails.
Pro Tip: Wipe your brush clean before curing so the gold lines stay neat.
11. Pearly Periwinkle Shells and Starfish

Description: Periwinkle shells with clear panels sit beside milky white nails dotted with pearls. A gold starfish and tiny gold beads complete the set. It looks sweet and polished.
Why It Works: The colors are soft enough for work and special enough for parties. Short almond nails carry it well.
Pro Tip: Add pearls last with a dot of gel, then cure again so they last through hand washing.
Cute and Colorful Pastel Mermaid Nails
Ready to have some fun? This group is all about purple, teal, glitter, and playful shapes that look like real mermaid tails.
These designs are great for birthdays, festivals, vacations, and photo days. They show off your personality, and they make people stop and ask where you got your nails done.
Do not worry if you are new to bold nails. You can start with one accent nail and add more color later. Here are four cute ideas to spark your imagination.
12. Purple and Teal Glitter Ombre

Description: Purple glitter fades into teal on long coffin nails. A few accent nails hold clusters of lilac and aqua gems. The glitter flashes like mermaid scales.
Why It Works: Coffin nails give you lots of room for ombre. These jewel tones look bright on deep and tan skin.
Pro Tip: Blend the colors with a sponge using small dabs instead of wide swipes.
13. Mermaid Scale Glitter in Lavender and Aqua

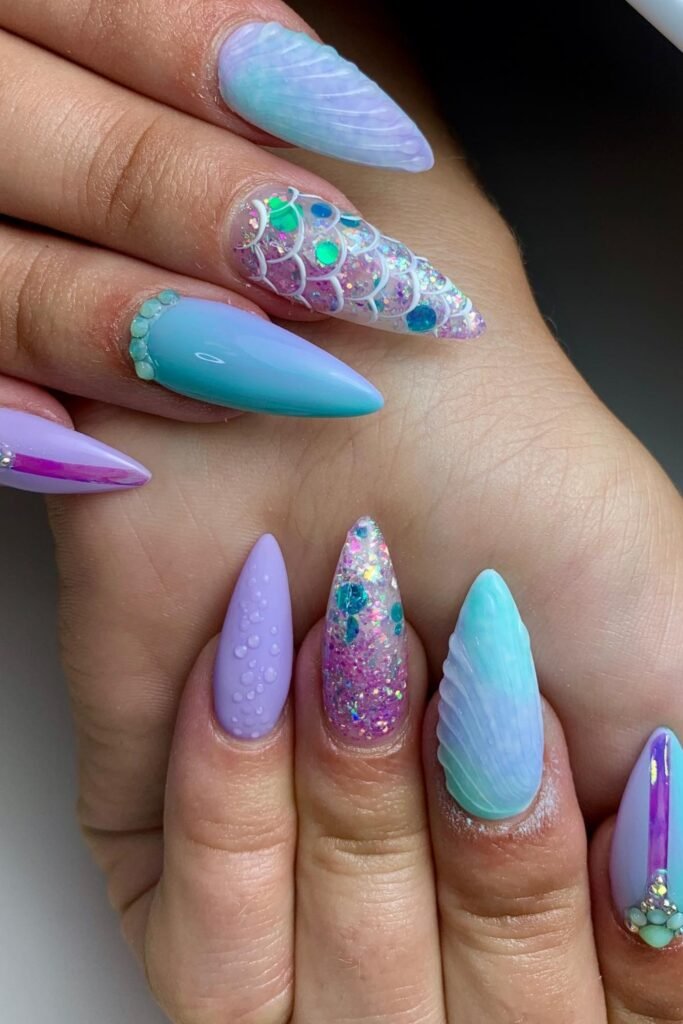
Description: Long stiletto nails mix lavender, aqua, and glitter scales with white lines. One nail has a 3D shell, and another has tiny bubbles. It looks just like a mermaid tail.
Why It Works: It is great for festivals and birthdays. Every nail looks different, so the set never feels boring.
Pro Tip: Paint the scale lines with thin white gel and cure often so they stay crisp.
14. Lavender 3D Mermaid Tail Nails

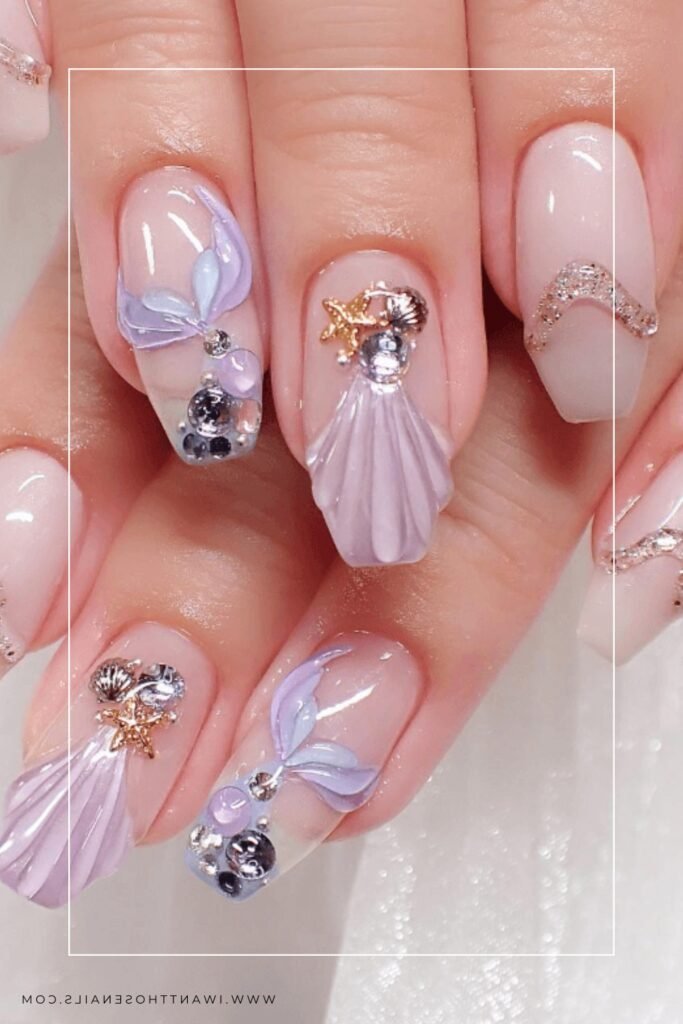
Description: Soft lilac tails and shell shapes rise from sheer pink nails. Gold starfish, silver shells, and gems add sparkle. It looks magical and sweet.
Why It Works: The pale base keeps it gentle on short and medium coffin nails. It is perfect for a party or fairytale look.
Pro Tip: Build each tail in thin gel layers, curing between layers, for clean shapes.
15. Lilac Ocean Wave Nails
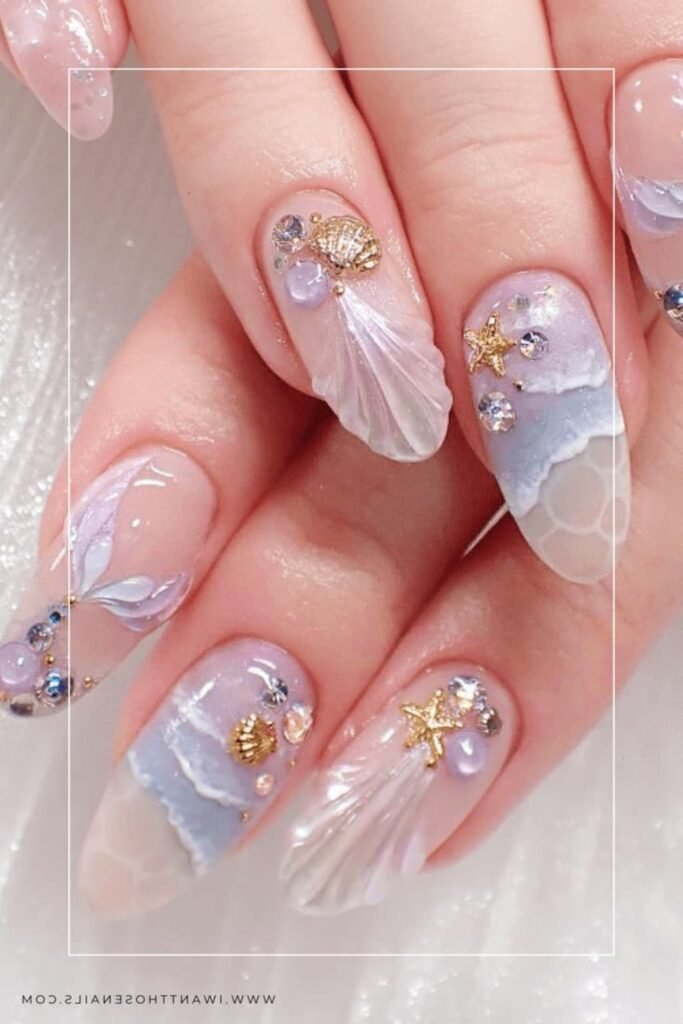
Description: Painted waves with white foam roll across lilac and blue nails. Pearly shells, a gold starfish, and a tiny mermaid tail add charm. Each nail tells a small beach story.
Why It Works: The color mix suits almost any skin tone and medium almond nails. It is great for summer trips.
Pro Tip: Dab white gel with a fine brush to make soft foam edges.
Trendy and Glamorous 3D Mermaid Nails
Now we get to the show-stoppers. These five sets use raised art, charms, flowers, and glitter to turn your nails into tiny works of art.
They take more time and skill, so many of them are best done by a nail tech. If you love detail, though, the result is worth it.
I like to tell clients to pick one star feature, such as a starfish, a flower, or a shell. Then let the rest of the set support it. That keeps your nails glam without feeling heavy.
16. Teal Marble Starfish and Seashell Nails

Description: Teal marble nails hold 3D orange starfish with white dots, while a brown striped shell adds a sandy touch. Pearls, gems, and bubbles make it fun. It looks like a real tide pool.
Why It Works: Orange and teal pop on warm and deep skin tones. Long stiletto nails show off the 3D art.
Pro Tip: Keep the 3D pieces small and cure them often so they do not smudge.
17. Aquarium Glitter Acrylic Nails
Description: Clear acrylic nails trap aqua glitter, star sequins, and silver shell charms like a tiny fish tank. Aqua jelly tips and rhinestones finish the look. It is flashy and playful.
Why It Works: It is perfect if you love bold nails. The clear base shows every layer of sparkle.
Pro Tip: Seal everything under thick clear gel so charms never snag on your hair.
18. Glossy Pink Jelly Shell Nails
Description: Pink jelly shells, pearl star outlines, and a tiny bow sit on glossy nude nails. Silver foil tips and white starfish add a cute touch. It feels girly and soft.
Why It Works: Pink looks lovely on warm, cool, and neutral skin tones. Long almond shapes hold all the details well.
Pro Tip: Set pearls in a thin gel outline so the star shape does not shift.
19. Coral Pink Hibiscus and Shell Nails

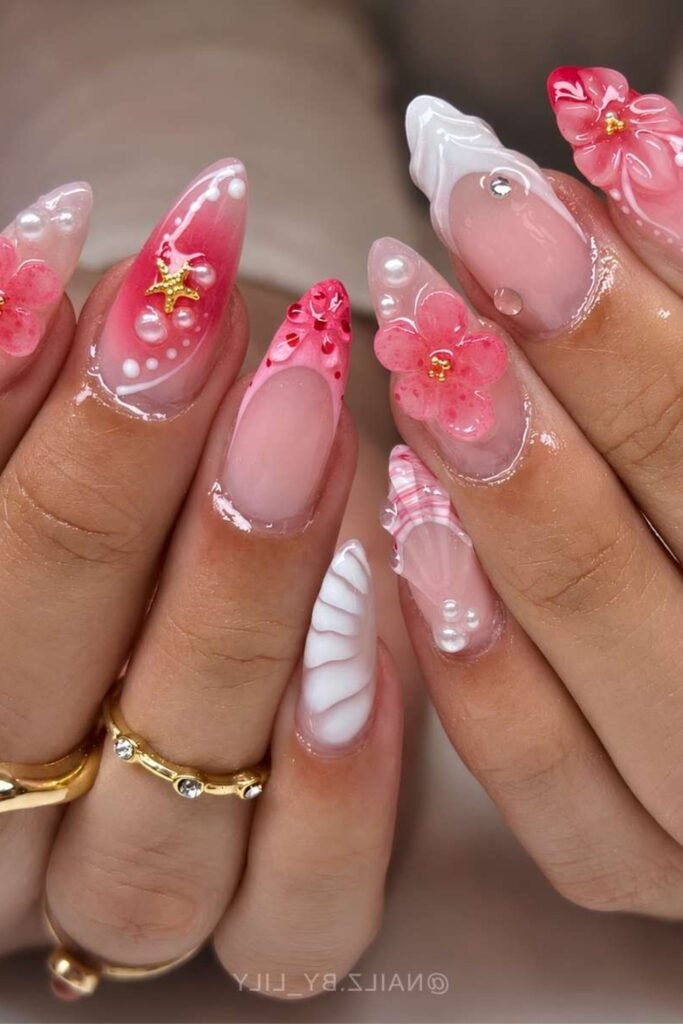
Description: Pink jelly hibiscus flowers, a glossy red ombre nail, and white 3D shells mix tropical and beach vibes. Pearls and a gold starfish finish it. It is bright, fresh, and summery.
Why It Works: Coral and pink glow on tan and deep skin tones. It is a happy choice for vacations.
Pro Tip: Shape each petal with tinted gel and cure as you go.
20. Pearl White and Sky Blue Hibiscus Nails
Description: Pearly white nails with raised bubble pearls sit beside sky blue nails with a white hibiscus. A sheer shell nail with a tiny gold starfish adds charm. It is breezy and cool.
Why It Works: Icy colors look crisp on tan and deep skin tones. It works for short to long nails.
Pro Tip: Use a small stencil for the hibiscus so the petals look even.
Mermaid Nails Tips: Shape, Color, Care, and Common Questions
Now that you have seen all 20 designs, let’s talk about how to make them work for you. These tips solve the most common nail problems, from short nails to chipping polish.
How to Pick the Best Nail Shape and Length
Mermaid nails look great on every shape, but some shapes show certain details better. Almond and stiletto nails give long, flowing lines, which makes shells and swirls look graceful. Coffin and ballerina nails give you a flat, wide space for glitter, gems, and tails.
Short, round, or squoval nails work too. Choose smaller charms, thin lines, and one accent nail instead of a full set of 3D art. This keeps the design neat and helps it stay snag free.
Think about your daily life as well. If you type all day, cook a lot, or work with your hands, keep 3D pieces small and low. Save the tall shells and big starfish for special events.
Best Mermaid Nail Colors for Your Skin Tone
Not sure what suits your skin tone? Here is a simple guide. These are not strict rules, so always pick the colors that make you smile.
- Fair skin: Soft lilac, baby blue, pearl white, and pale pink look fresh and gentle.
- Light to medium skin: Aqua, seafoam, peachy pink, and silver chrome add a bright glow.
- Olive skin: Sage green, deep teal, and gold details look rich and warm.
- Tan to deep skin: Bright turquoise, purple, coral, hot pink, and gold stand out beautifully.
If you are unsure about your undertone, look at the veins on your wrist. Blue or purple veins often mean a cool undertone, and green veins often mean a warm one. If you cannot tell, you may be neutral, and almost every shade will work for you.
Mermaid Nails for Short Nails
Many people think short nails cannot look stylish. I promise they can! Mermaid nails are actually perfect for short lengths because the shine and tiny details make them feel special.
Here are a few easy tricks to make short nails look their best:
- Choose a sheer nude or pink base to make your nails look longer.
- Try French tips, like the jelly tips in design 2, to add length with color.
- Pick one accent nail for a shell or charm instead of covering every nail.
- Use vertical lines and stripes, like the holographic set in design 6, to draw the eye upward.
- Keep gems and pearls small so they do not crowd the nail.
Tools and Products You Need for Mermaid Nails at Home
You do not need a full salon kit to try mermaid nails at home. Start with the basics, and add fancy tools as you grow more confident.
- A base coat and a no-wipe top coat
- Gel polish in your favorite ocean shades
- Builder gel for 3D shapes and for holding gems
- A thin liner brush and a dotting tool
- Chrome or pearl powder with a silicone applicator
- Pearls, gems, and small charms
- An LED nail lamp
- A soft file, a buffer, and cuticle oil
If you feel nervous about 3D art, start with chrome powder or stamping. These two methods give a big mermaid effect with very little skill. Save the sculpted shells and flowers for later.
Easy Step-by-Step Mermaid Nails at Home
Here is a simple routine for a chrome and pearl mermaid look. Take your time and cure each layer fully.
- Wash your hands, shape your nails, and gently push back your cuticles.
- Lightly buff the shine off each nail, then wipe away the dust.
- Apply a thin layer of base coat and cure it under the lamp.
- Paint two thin coats of your sheer pink or nude gel, curing after each coat.
- Add a no-wipe top coat, cure it, and rub chrome powder over the surface.
- Place pearls, gems, or charms with a small dot of builder gel, then cure.
- Seal the whole nail with top coat, cap the free edge, and cure one last time.
- Finish with a drop of cuticle oil on each nail.
How to Stop Mermaid Nails from Chipping
Chipping is the most common complaint I hear. The good news is that most chips come from small prep mistakes. A few simple habits can add days or even weeks to your manicure.
- Always prep your nails by removing oil and dust before the base coat.
- Apply thin layers. Thick layers stay soft underneath and peel off easily.
- Cap the free edge by running each coat lightly along the tip.
- Seal around gems and charms with top coat so the edges do not lift.
- Wear gloves when you wash dishes or clean.
- Never use your nails as tools to open cans or scratch stickers.
If you use regular polish instead of gel, add a fresh layer of top coat every two or three days. This keeps the shine bright and protects the color.
How to Protect Your Natural Nails
Pretty nails are only fun if your natural nails stay healthy. The biggest cause of damage is peeling or picking off gel and acrylic. This pulls off layers of your natural nail and leaves it thin and weak.
Instead, soak off your nails the safe way. File the top coat gently, wrap cotton soaked in acetone on each nail with foil, and wait about 10 to 15 minutes. Then slide the softened product off with a wooden stick.
Between sets, give your nails a short rest and use cuticle oil every day. Drink plenty of water and eat a balanced diet, because healthy habits show up in your nails too. If you notice pain, redness, or swelling, please see a nail professional or a doctor.
What to Ask For at the Salon
Bringing photos is the best way to get the nails you want. You can show your nail tech any design from this guide and say the number. Here are a few things to mention:
- Your preferred shape and length, such as short almond or long coffin.
- Whether you want gel, builder gel, or acrylic.
- Which details you want, such as pearls, charms, or 3D shells.
- How long the set should last and how you plan to remove it.
- The price and the time needed, since 3D art can take longer.
Do not be shy about asking for changes. You can swap colors, use fewer charms, or ask for smaller details. A good nail tech will happily adjust the design to fit your lifestyle.
Mermaid Nail Finishes Explained
Mermaid nails use a few special finishes again and again. Knowing their names helps you ask for the right look at the salon. It also helps you shop for the right products at home.
- Chrome and aurora: A mirror-like powder that shifts between blue, pink, and green, as seen in designs 4, 6, and 9.
- Pearl and milky finishes: A soft, glowing white that looks like the inside of a shell, as seen in designs 7 and 20.
- Jelly: A see-through color that looks like glossy candy, as seen in designs 2 and 18.
- Glitter scales: Chunky glitter and drawn lines that copy a mermaid tail, as seen in designs 12 and 13.
- 3D gel art: Raised shells, flowers, and starfish shaped by hand, as seen in designs 14, 16, and 19.
- Encapsulated art: Glitter and charms sealed inside clear acrylic, as seen in design 17.
You can mix two or three finishes in one set. Just keep one finish as the star so your nails do not look too crowded.
Which Mermaid Nails Fit Your Occasion?
The best nail design is one that fits your day. Here are a few easy ideas to match your plans.
- Work or school: Try the jelly tips in design 2 or the gold outlines in design 8.
- Weddings and dates: Go for the pearl shells in design 7 or the periwinkle set in design 11.
- Beach trips: Pick the ocean waves in design 15 or the hibiscus set in design 19.
- Birthdays and festivals: Choose the glitter scales in design 13 or the aquarium nails in design 17.
- Everyday wear: Try the holographic stripes in design 6 or the chrome swirls in design 4.
If you are not sure, start with a softer set and add one fun accent nail. You can always go bolder next time.
How to Mix and Match Mermaid Nail Ideas
You do not have to copy a design exactly. Many of my favorite sets come from mixing two or three ideas. This is a great way to make your nails feel one of a kind.
For example, you could take the pearl nude base from design 8 and add the starfish from design 1. Or you could use the lilac waves from design 15 with the gems from design 12. Pick one color family, then repeat it on every nail so the set feels connected.
A good rule is to use plain, shiny nails to balance the detailed ones. This gives your eyes a place to rest. It also keeps your mermaid nails stylish instead of messy.
Common Mermaid Nail Mistakes to Avoid
Even small mistakes can change how your nails look and last. Here are the ones I see most often, along with easy fixes.
- Using too much product: Thick polish or gel stays wet underneath. Use thin layers and cure each one.
- Skipping the prep: Oil and dust make polish peel. Buff, wipe, and dry your nails first.
- Adding too many charms: A crowded nail can look messy and snag on clothes. Pick one or two focus pieces.
- Forgetting the free edge: Uncapped tips chip fast. Brush a little color and top coat along the tip.
- Choosing a shape that does not fit your life: Very long nails with tall 3D art can be hard to use every day. Choose a length you feel comfortable with.
A Simple Daily Routine to Keep Mermaid Nails Shiny
A little daily care keeps your set looking fresh. It only takes a minute or two, and it protects both your design and your natural nails.
Apply cuticle oil in the morning or at night, and rub it in gently. This keeps the skin around your nails soft and helps stop dry, cracked edges. Add hand cream after you wash your hands.
Be gentle when you use your hands. Use the pads of your fingers to open things, and keep gentle cleaners away from your nails. If a charm feels loose, ask your nail tech to fix it soon so it does not catch and pull your natural nail.
Budget Tips for Mermaid Nails
Mermaid nails can look fancy, but they do not have to cost a lot. A few smart choices can save you money and time.
- Choose one or two 3D accent nails instead of a full set of sculpted art.
- Buy a small pack of pearls, gems, and shell charms to use on many manicures.
- Try chrome powder or stamping, which give a big look for a low price.
- Book a fill or a simple change instead of a brand new set when your nails grow out.
At home, one good top coat and one great liner brush will do more for you than a huge pile of products. Spend your money where you will see the biggest results. Then enjoy your dreamy nails for weeks.
Frequently Asked Questions About Mermaid Nails
What are mermaid nails?
Mermaid nails are nail designs inspired by the sea. They often use pearls, shells, chrome, glitter scales, and shades of blue, teal, and lilac.
How long do mermaid nails last?
Gel mermaid nails usually last two to three weeks with good prep and care. Acrylic or builder gel sets can last a little longer, but you may need a fill after a few weeks.
Can I get mermaid nails on short nails?
Yes, you can! Choose chrome, French tips, or small gems and keep the 3D art to one or two accent nails.
Are mermaid nails bad for my natural nails?
They are safe when applied and removed with care. The damage usually comes from peeling, over-filing, or skipping rest time between sets.
What colors go best with mermaid nails?
Aqua, teal, lilac, baby blue, pearl white, and soft pink are the classics. Gold and silver add a pretty finishing touch.
Final Thoughts
Mermaid nails are a fun way to bring a little ocean magic into your everyday life. With 20 ideas, you can choose a soft pearl set, a bright glitter tail, or a bold 3D starfish. There is a design here for every nail length, skin tone, and mood.
Remember to prep well, apply thin layers, and care for your natural nails. Those simple steps make your manicure look better and last longer.
Which design is your favorite? Save your top picks, show them to your nail tech, and enjoy your new dreamy set.