Insanely Good Nail Art Ideas: 20 Gorgeous Designs You Will Want to Try
Picking a new manicure is exciting. It is also a little stressful. There are so many colors, shapes and patterns that it is hard to know where to start.
If you have ever saved a dozen photos and still could not decide, you are not alone. You may also worry that your short nails will look plain, or that your polish will chip in two days. Many people are not sure which colors suit their skin tone, and harsh products can leave nails thin and dry.
That is why I put together these insanely good nail art ideas. They range from soft and dainty to bold and dramatic. Each one is something you can show your nail tech or try at home with a few simple tools.
You will see florals, hearts, stars, marble, glitter, leaves and more. There are designs for short nails, long nails and everything in between. Some are perfect for beginners, and some are great when you want to show off.
For every idea, you will get a short description, a reason it works and one pro tip. I keep the advice simple so you can use it right away.
After the designs, you will find a full guide on picking colors, making nail art last and caring for your nails. Let’s get started.
Pretty and Feminine Insanely Good Nail Art Ideas
We will begin with soft and pretty looks. These five designs use flowers, hearts, marble and delicate gold. They are perfect if you love nails that feel sweet, romantic and polished.
1. Dainty Floral French Tips with Gold Accents
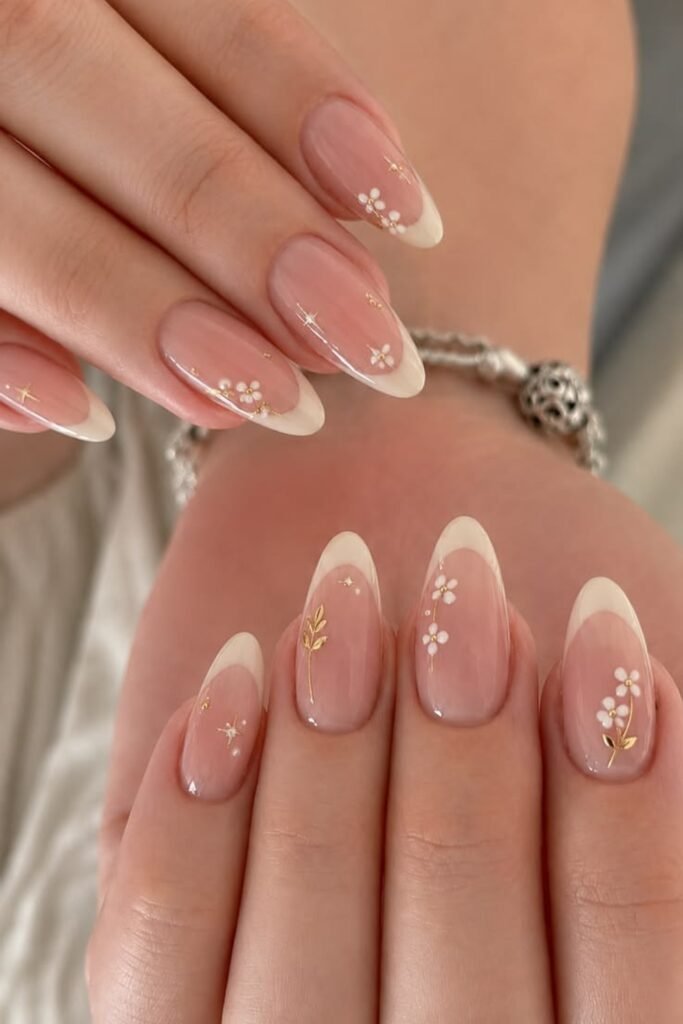
Description: Soft cream French tips sit on a sheer pink base with tiny white flowers, gold stars and a little gold leaf sprig. You need white gel, gold foil and a fine brush. The vibe is dainty, bridal and sweet.
Why It Works: Almond nails give the art room to breathe. It flatters light and medium skin and suits weddings and spring days.
Pro Tip: Place gold foil with tweezers, then seal it with a thin top coat.
2. Chocolate Hearts and Swirls Mix and Match

Description: Glossy chocolate nails, a brown French tip, wavy swirls and tiny hearts make a sweet mix and match set. You need brown gel and a thin brush. The vibe is cozy, playful and cute.
Why It Works: Different nails keep the set fun without feeling busy. Brown looks lovely on warm and deep skin tones.
Pro Tip: Draw hearts with a dotting tool and drag one side to a point.
3. Emerald Glitter Garden Nails

Description: Rich emerald nails mix with green glitter, glitter-dipped tips and one black botanical nail with white flowers. You need green glitter gel and a fine liner brush. The look is lush, festive and rich.
Why It Works: Green glitter adds shine without being too loud. It looks great on all skin tones.
Pro Tip: Apply glitter gel in thin layers so the sparkle stays even.
4. 3D Pink Flower and Leopard Stilettos

Description: Long pink stilettos carry 3D flowers, leopard print, tiny rhinestones and sculpted gel tips. You need builder gel, small flowers and a thin brush. The look is bold, glam and full of personality.
Why It Works: Long nails give you plenty of space for details. It suits special events and people who love statement nails.
Pro Tip: Ask your nail tech to use strong builder gel so the 3D parts last.
5. Mauve Marble Nails with Gold Foil
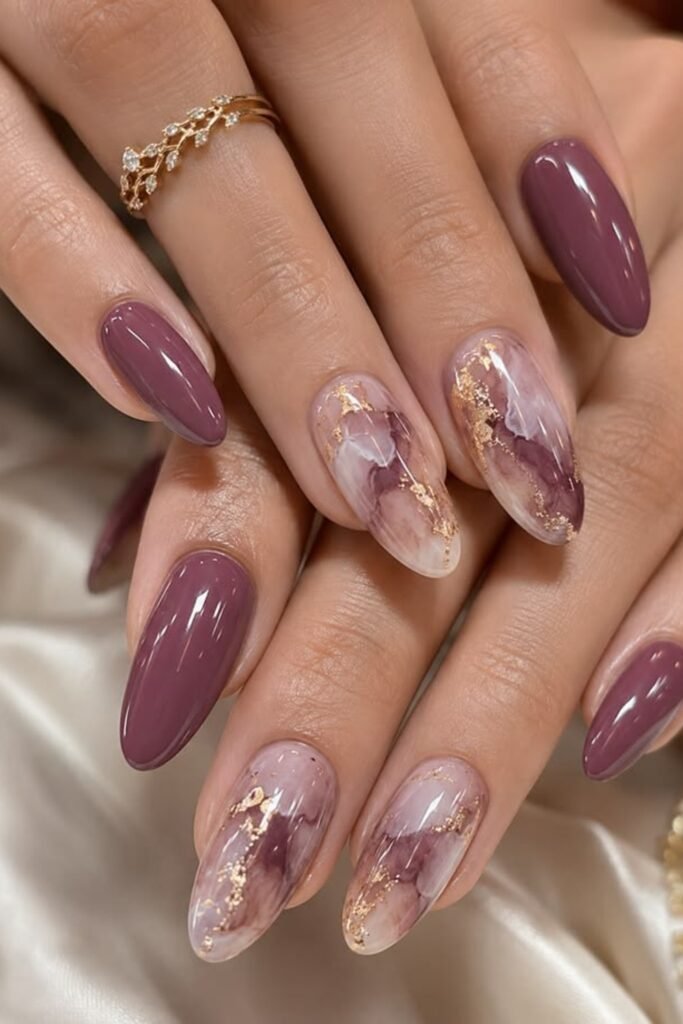
Description: Glossy mauve nails mix with milky marble nails swirled with plum and gold foil. You need sheer gel, plum gel and gold foil flakes. The vibe is elegant, rich and moody.
Why It Works: Mauve flatters nearly every skin tone. The marble nails add art while the solid nails keep it classy.
Pro Tip: Blend the marble with a clean brush while the gel is still wet.
Bold and Trendy Insanely Good Nail Art Ideas
Ready for something with more attitude? These five looks use deep colors, matte finishes and fun patterns. They are great for anyone who wants nails that stand out in a crowd.
6. Navy Stiletto Nails with Negative Space Patterns

Description: Deep navy stilettos use glossy solids, negative space French tips and a smoky cell pattern. You need navy gel, a thin brush and a glossy top coat. The look is edgy and modern.
Why It Works: Navy feels softer than black but still bold. It suits long nails and evening wear.
Pro Tip: Outline the shape first, then fill it in, so the pattern stays neat.
7. Matte Earth Tone Nails with Gold Dots

Description: Matte blush, terracotta, sage and mauve nails each have a small line of gold dots. You need four matte polishes and gold micro beads. The vibe is calm, earthy and chic.
Why It Works: The soft palette goes with any outfit. It is a fun way to mix colors without clashing.
Pro Tip: Press the beads in a gentle curve with a wax pencil for a neat line.
8. Beach Palm Tree and Sand Nails
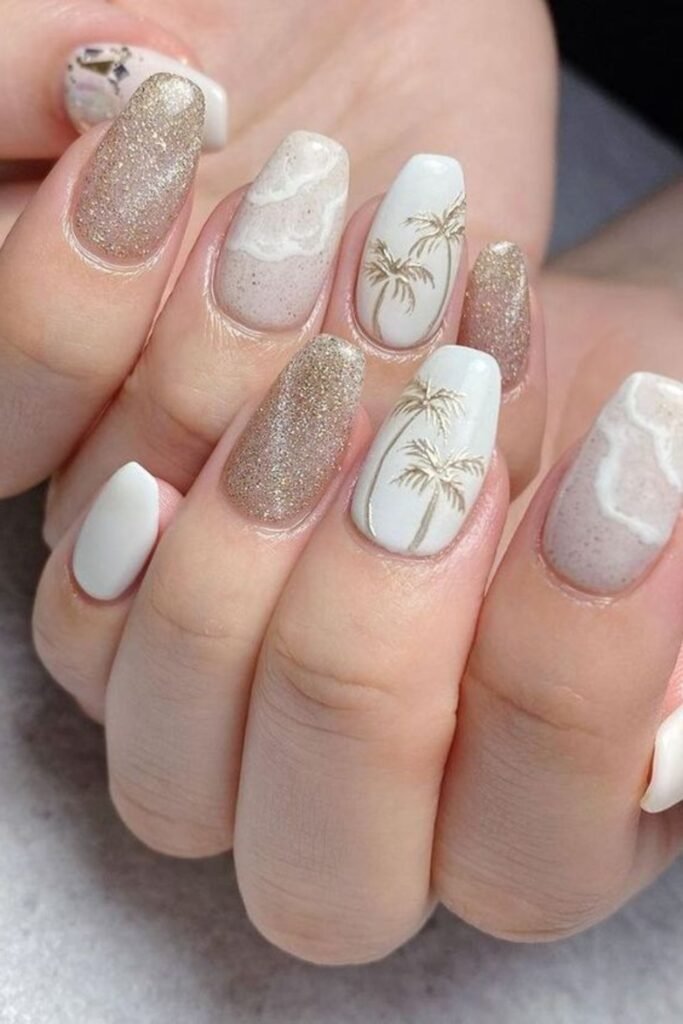
Description: Gold glitter, white, sandy waves and golden palm trees make a beach vacation set. You need a sheer sand shade, white gel and a gold liner. The look is breezy, fun and sun-kissed.
Why It Works: It is perfect for holidays and summer trips. The neutral colors suit every skin tone.
Pro Tip: Use thin gold liner for the palm leaves so they look light and natural.
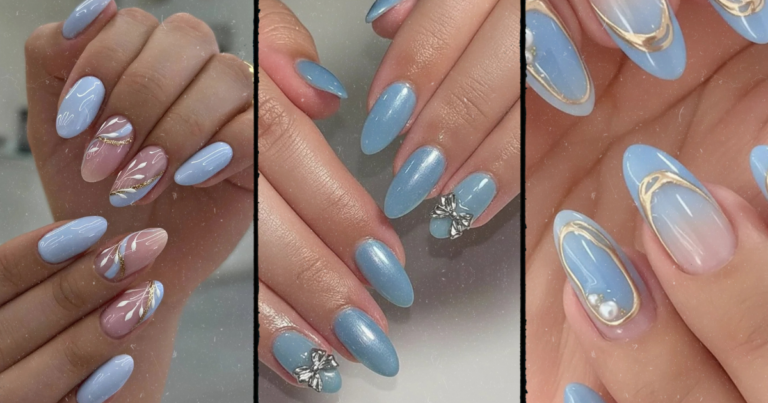
9. Icy Blue Cat-Eye Nails with White Florals
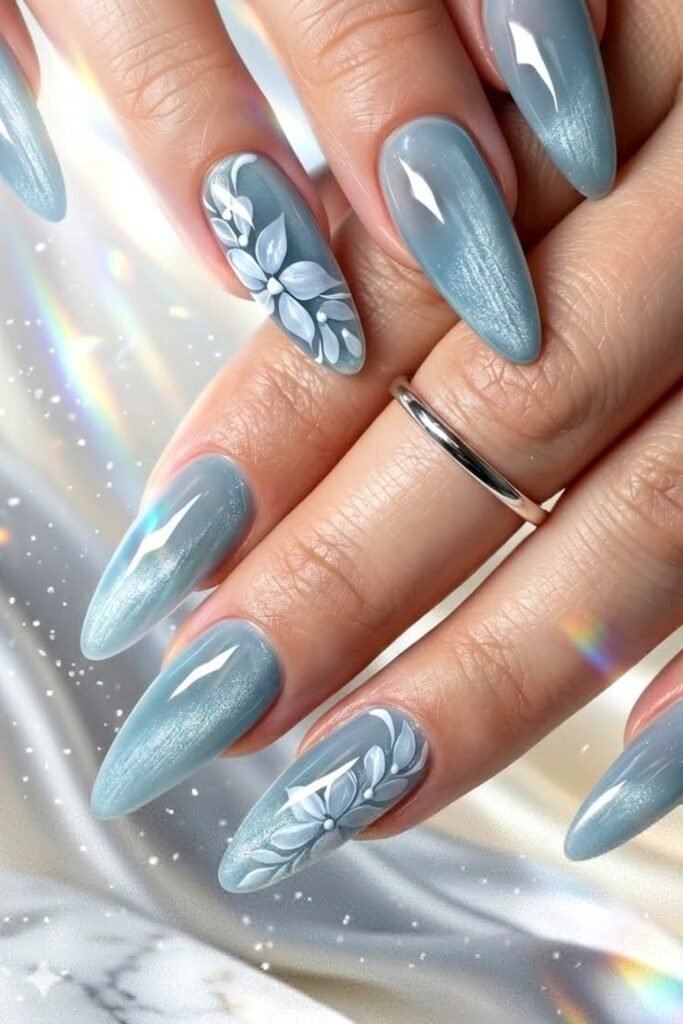
Description: Dusty blue cat-eye nails shimmer like silk, with hand-painted white flowers on two accent nails. You need magnetic gel, a magnet and white gel. The vibe is cool, calm and elegant.
Why It Works: Blue looks fresh in summer and wintry in cold months. It flatters fair and medium skin.
Pro Tip: Hold the magnet steady for ten seconds to lock in the glow.
10. Brown Bow Nails on Pink French Tips
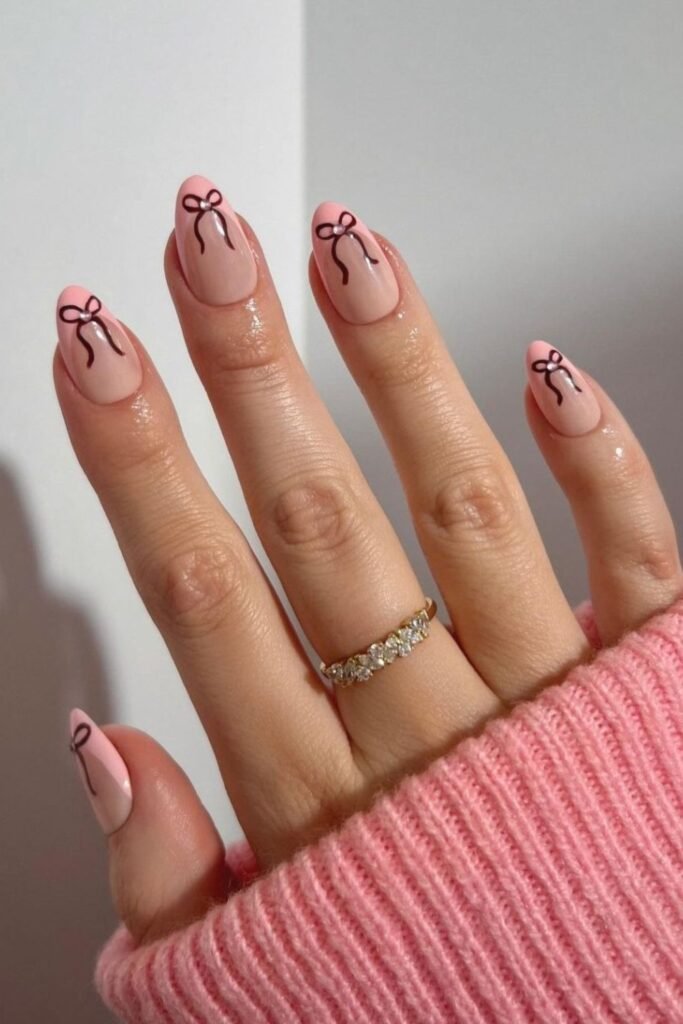
Description: Pink French tips are topped with thin brown bows and a tiny pink gem. You need a fine brush, brown gel and a small rhinestone. The look is cute, girly and trendy.
Why It Works: Bows are easy to place at the tip, so they work on short and medium nails. It is great for everyday fun.
Pro Tip: Draw the loops first, then add the tails for a neat bow.
Glamorous and Dreamy Insanely Good Nail Art Ideas
This group is full of sparkle, crystals and magic. You will see stars, butterflies, stripes and swirls. These are the looks to pick for parties, weddings and any day you want to feel extra special.
11. Black Starry Night Nails

Description: Glossy black nails are scattered with silver stars, dots and tiny sparkles. You need black gel, silver gel paint and a thin brush. The vibe is moody, magical and cosmic.
Why It Works: Black hides stains and chips well, and the silver pops on top. It works on short and medium nails.
Pro Tip: Make each star with two crossed lines, then add tiny dots for glow.
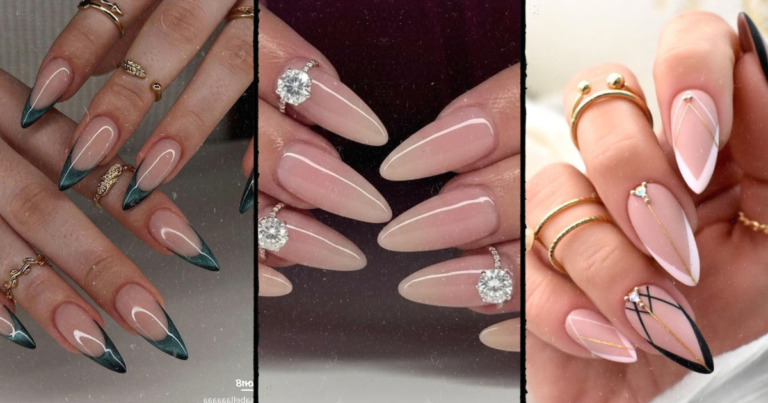
12. Nude Almond Nails with Crystal Rhinestones
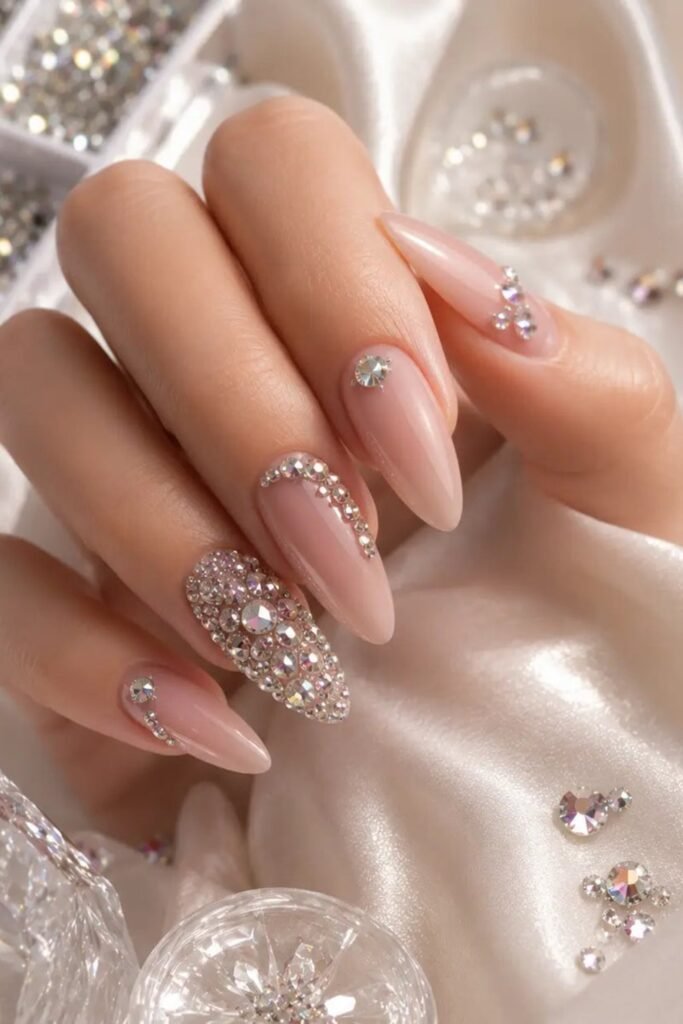
Description: Sheer nude almond nails are decorated with clear crystals, plus one fully jeweled accent nail. You need strong gel glue, crystals and a picking tool. The vibe is bridal, glam and luxe.
Why It Works: The nude base lets the crystals sparkle. It is perfect for weddings and parties.
Pro Tip: Seal the crystal edges with a thin layer of top coat to help them last.
13. Pink Candy Stripe and Glitter Short Nails

Description: Short square nails in baby pink get one accent nail with white and glitter stripes and another covered in sparkle. You need white gel, glitter gel and a striping brush. The look is sweet, festive and simple.
Why It Works: Short nails look pretty with just two accents. It is ideal for the holidays and for beginners.
Pro Tip: Use a long striping brush to keep each stripe straight.
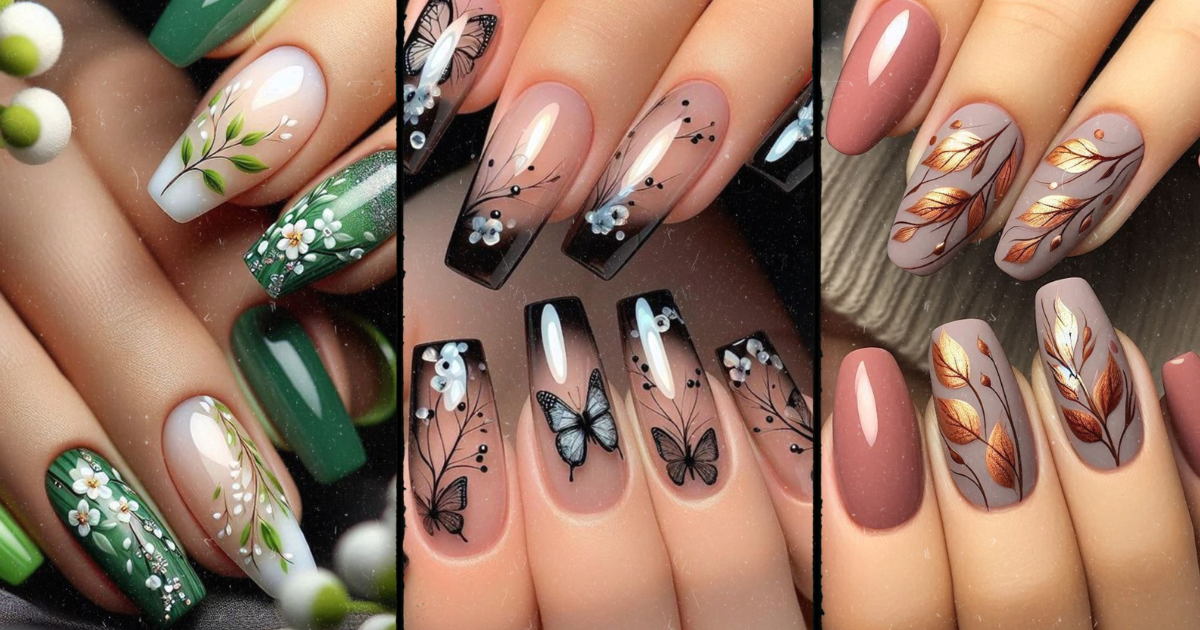
14. Black Ombre Butterfly Nails
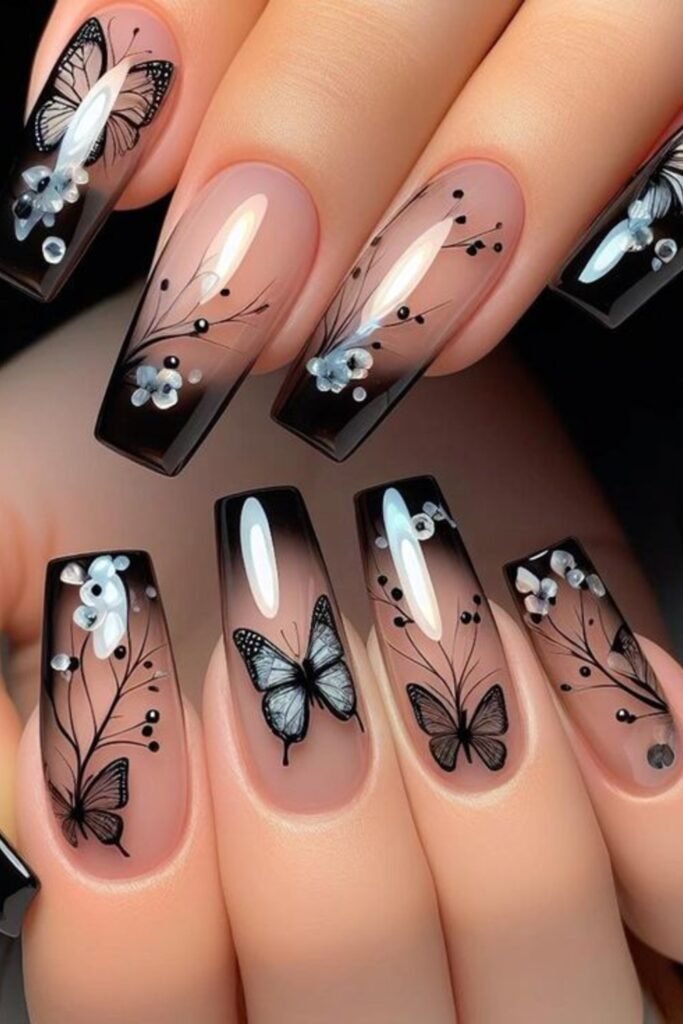
Description: Long coffin nails fade from nude to black with butterflies, branches and tiny blue flowers. You need a sponge, black gel and a fine brush. The look is dramatic, dreamy and detailed.
Why It Works: The black tips make long nails look sleek. It suits evening events and anyone who loves detailed art.
Pro Tip: Sponge the black from the tip upward in thin layers for a soft fade.
15. Sage Green Swirl Line Nails
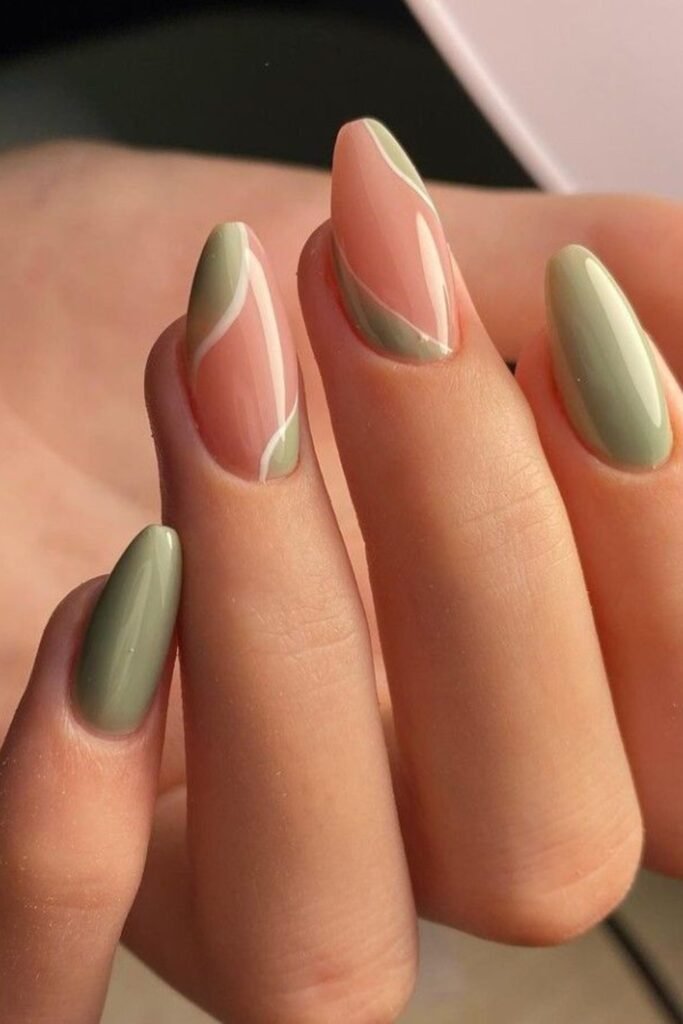
Description: Sage green and sheer nude nails feature thin white swirl lines and solid green accents. You need sage gel, white gel and a thin brush. The vibe is calm, modern and fresh.
Why It Works: Sage is a soft color that suits many skin tones. It is easy to wear every day.
Pro Tip: Practice the swirl on paper first to build a steady hand.
Chic Insanely Good Nail Art Ideas for Every Season
Our last five designs fit different seasons and moods. You will find edgy black and silver, warm fall leaves, fresh spring flowers and sleek matte gold. Pick the one that matches your calendar and your style.
16. Black Glitter Coffin Nails with Silver Lines

Description: Long coffin nails have black glitter French tips, crisscross lines and thin silver stripes. You need black glitter gel, silver liner and a thin brush. The vibe is edgy and glam.
Why It Works: The coffin shape gives you wide nails for bold lines. It looks great for nights out.
Pro Tip: Use silver liner gel for crisp, shiny lines.
17. Autumn Copper Leaf Nails
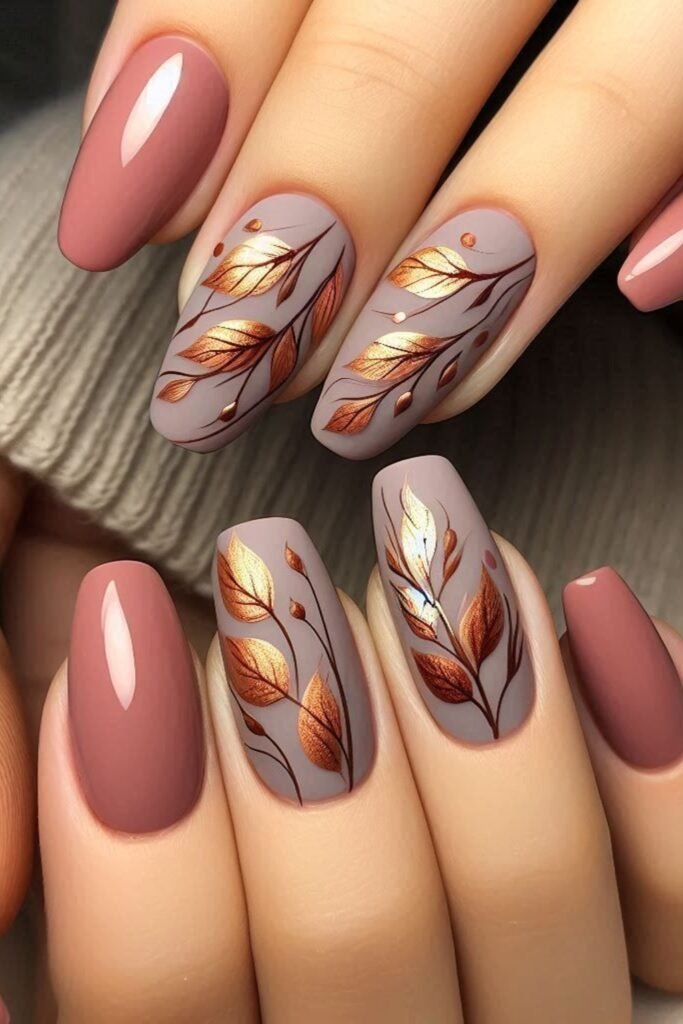
Description: Rosy mauve nails mix with taupe accent nails painted with copper and gold leaves. You need metallic gel, a thin brush and a matte top coat. The look is warm, rich and cozy.
Why It Works: These shades are made for fall. They suit medium and long nails and look beautiful on warm skin.
Pro Tip: Paint each leaf with two quick strokes, then add a thin stem.
18. Spring Green Floral Coffin Nails

Description: Emerald, lime and milky white nails are decorated with leafy branches and tiny white blossoms. You need green gels, white gel and a fine brush. The vibe is fresh, floral and cheerful.
Why It Works: It brings a garden to your hands. It is great for spring weddings and brunches.
Pro Tip: Paint stems first, then leaves, then flowers for a natural look.
19. Matte Black and Gold Nails

Description: Matte black nails are dressed up with gold foil, thin stripes and tiny dots. You need a matte top coat, gold striping tape and gold foil. The look is bold, chic and glam.
Why It Works: Black and gold feels dressy on any nail shape. It is great for evenings and holidays.
Pro Tip: Apply the matte top coat first, then add the gold details so they stay shiny.
20. Sage Leaf French Tips with Gold Lines

Description: Almond nails have sage green leaf tips outlined with fine gold lines on a sheer nude base. You need green gel, gold liner and a thin brush. The look is delicate, natural and elegant.
Why It Works: The sheer base keeps short and medium nails light. It suits spring weddings and daily wear.
Pro Tip: Draw the leaf veins with one smooth stroke for a clean finish.
Our Review of These Insanely Good Nail Art Ideas
After going through all 20 designs, one thing is clear. Great nail art does not have to be complicated. It just needs a good color story, clean lines and a shiny finish.
Here is how the designs stack up. We looked at beauty, wearability and how easy each one is to copy.
| Best For | Our Top Picks |
|---|---|
| Beginners | Designs 7, 10, 13, 15 and 20 |
| Short nails | Designs 10, 11, 13, 15 and 20 |
| Long nails | Designs 4, 6, 14, 16 and 18 |
| Weddings and events | Designs 1, 5, 12 and 20 |
| Fall and winter | Designs 2, 3, 5, 7, 17 and 19 |
| Spring and summer | Designs 1, 8, 9, 18 and 20 |
| Nail art lovers | Designs 3, 4, 14 and 18 |
Our top rated designs are the dainty floral French tips in design 1, the brown bow nails in design 10 and the sage leaf French tips in design 20. They are pretty, wearable and not too hard to copy. They also look great in photos.
The boldest looks are the 3D leopard stilettos in design 4 and the butterfly ombre nails in design 14. They take real skill, so it is best to book a nail tech who does detailed art. The result is a set that gets noticed everywhere you go.
The best value picks are designs 7, 13 and 15. They use simple shapes and soft colors, and they grow out well. You can wear them for weeks without looking messy.
Your Complete Guide to Insanely Good Nail Art
A pretty design is only part of the story. The right prep, tools and care make your nail art look better and last longer. Here is the advice I give my own clients.
Start with the Right Nail Shape and Length
Your nail shape sets the stage for your art. Almond and oval nails make fingers look slim and work with almost any design. Coffin and square nails give you a wide canvas for big art and bold lines.
Stiletto nails look dramatic but need more care. If you have short nails, pick a soft round or short square shape. Small details like bows, dots, stars and thin lines look great on short nails.
Pick Colors That Suit Your Skin Tone
The right color makes your hands glow. The wrong shade can make them look dull. Use these simple guides to pick your colors.
If you have fair skin, soft pinks, creams, lavender and cool blues look lovely. If you have medium or olive skin, sage green, terracotta, mauve and gold are great picks. If you have deep skin, rich browns, emerald, bright pink, copper and metallic shades look stunning.
Black, white and nude work for every skin tone. When in doubt, add one of these as a base and put your favorite color in the art.
Gather Simple Tools for Nail Art at Home
You do not need a full salon kit to try nail art. A few basic tools can create many of these looks. Here are the ones I use most.
- A base coat and a strong top coat
- A dotting tool for dots, hearts and flowers
- A thin liner brush for lines and leaves
- A makeup sponge for ombre and fades
- Striping tape for sharp straight lines
- Tweezers and a wax pencil for gems and foil
- Cuticle oil for daily care
If you use gel polish, you will also need an LED lamp. Always cure each layer as the bottle says. Thin layers cure better and last longer.
Follow This Easy Nail Art Routine
Good nail art starts with good prep. Follow these steps for a clean, long-lasting result.
- Push back your cuticles and shape your nails with a fine file.
- Lightly buff the surface and wipe each nail with alcohol.
- Apply a thin base coat and let it dry or cure.
- Paint two thin coats of your main color.
- Add your art with a thin brush, dotting tool or tape.
- Let the art dry fully before sealing it.
- Apply a top coat and cap the free edge.
- Finish with cuticle oil once everything is dry.
Make Your Nail Art Last Longer
Nobody wants a beautiful design to chip in two days. Most chips come from oil on the nail, thick coats or a missing top coat. A few small habits make a big difference.
Wipe each nail with alcohol before you start. Use thin coats and always cap the tip. Add a fresh top coat every few days to keep the shine and protect the art.
Wear gloves when you wash dishes or clean. Hot water and strong soap soften polish and make it lift. Also avoid using your nails as tools to open cans or scrape labels.
Protect Your Natural Nails
Pretty nails should also be healthy nails. Never peel off gel or acrylic, because it pulls off layers of your natural nail. Soak it off properly or visit your nail tech for removal.
Use a gentle remover and moisturize after each use. Take a short break between sets if your nails feel thin or bendy. Apply cuticle oil every day, even if it is just before bed.
Eat foods with protein, iron and biotin, and drink enough water. Strong nails start from the inside. Healthy nails make every design look better.
Ask for the Look at the Salon
Always bring a photo to your appointment. Say the shape, length, finish and colors you want in clear words. For example, say “short almond, sheer pink base, thin gold lines and tiny white flowers.”
Ask if the nail art is hand painted or uses stickers or foils. Tell your nail tech about any nail damage so they can choose gentle methods. Also ask how long the set should last and how to care for it.
Get Nail Art on a Budget
Nail art does not have to cost a lot. Ask for art on only two accent nails and keep the rest plain. This saves time and money while still looking special.
You can also use nail stickers, foils and gems from a beauty store. Simple designs like dots, stripes and thin lines are fast and look great. Learn one new skill at a time, and your skills will grow quickly.
Choose Nail Art for the Season
Matching your nails to the season makes them feel fresh. In spring, pick pastels, flowers and sage green. In summer, go for bright colors, beach art and light shimmer.
In fall, warm browns, copper leaves and earthy tones feel cozy. In winter, deep greens, black, silver stars and glitter look festive. You can also change just one accent nail to refresh your look.
Common Nail Art Mistakes to Avoid
Do not add too many designs on one nail. When everything fights for attention, the look feels messy. Pick one star feature and let the rest support it.
Do not skip the base coat or top coat. Do not use thick polish, because it takes longer to dry and smudges. Also do not rush your drying time, since smudges are the most common nail art problem.
Frequently Asked Questions About Insanely Good Nail Art Ideas
What are the easiest nail art ideas for beginners?
Dots, thin stripes, small hearts and simple French tips are great starting points. Designs 7, 10, 13 and 15 in this guide are all beginner friendly. Start with one accent nail, then add more as you gain confidence.
Can short nails have nail art?
Yes, they can. Small details like bows, stars, tiny flowers and thin lines look lovely on short nails. A soft round or short square shape works especially well.
How long does nail art last?
Regular polish art lasts about five to seven days. Gel nail art can last two to three weeks with good prep and a strong top coat. Careful daily care helps it last longer.
What nail art colors are best for my skin tone?
Fair skin looks lovely in soft pink, cream and cool blue. Medium and olive skin glows in sage green, terracotta and gold. Deep skin shines in rich brown, emerald, copper and bright pink.
How do I stop nail art from chipping?
Prep your nails with alcohol, use thin coats and seal the free edge with top coat. Wear gloves for chores and reapply top coat every few days. These small steps add a lot of wear time.
Is nail art bad for my natural nails?
Nail art itself does not harm nails. Damage usually comes from peeling off polish or using harsh removers. Remove products gently, moisturize and give your nails short breaks.
Final Thoughts on Insanely Good Nail Art Ideas
You now have 20 insanely good nail art ideas to choose from. There are soft florals, bold black designs, sparkly crystals and cozy fall leaves. Every one can work on different nail lengths, shapes and skin tones.
Start with the design that makes you smile the most. Use the tips above to prep well, pick the right colors and keep your nails healthy. Then show your favorite photo to your nail tech, or grab your brush and try it yourself.
Which of these insanely good nail art ideas will you try first? Save your top picks and enjoy your fresh new manicure.